
How I started a blog for free: At the age of 26, I lost my job. I have applied for many jobs, but every application is rejected. I have no idea what to do.
At that time, on YouTube, I watched a video that people are making money by sitting in their homes by writing blogs.
I was a person always interested in writing something. I have researched blogging and decided to just give it a try. Now I am realizing that it was the best decision I have made.
Now it’s giving me a 5-figure income every month. I am sure I can’t make it by doing any other job with my limited knowledge.
This blog is for you to help you to make money online by writing blogs. I will help you to earn money online by writing blogs that are helpful for everyone who is interested in writing.
How to Start a Blog for Free and Make Money Online?
Did you ever think of starting a blog for free but didn‘t know where to begin or thought that it would be expensive? Good news — you don‘t have to pay a single rupee to begin. In fact, most successful bloggers began with free tools and fundamental methods. Here on this blog, I‘ll take you through the way of starting your blog without paying a rupee and later turning it into an income-generating stream.
This Step-by-Steps Guide You How to Start a Blog for Free
Step 1: Choose the Niche You Want to Write About
Let’s begin your blogging experience with one of the most crucial choices — selecting the best blog topic and naming your blog.
Now, in contrast to common wisdom, starting a blog solely from passion is not always the best solution — at least not if you want to turn it into a sustainable business.
Sometimes passion will bring consistency and flow to writing the topic. There are many types of niches; some will generate more profit, and some are more scalable than others, so research the niche and choose wisely.
Think about it and answer the questions below, then choose the niche.
- Do I have experience in the niche and want to study it?
- To whom am I writing the article? What are their age, likes, and behavior?
- Can I be able to write an article about the topic I choose?
- What is the average RPM (revenue per mille) for this niche?
- Are there any unique advantages or insights that I can offer in this field?
- Can this niche be monetized well in the long run?
Remember — a too general or random niche might not leave you with any space to expand or generate revenue opportunities. You need a balance of interest, knowledge, and commercial viability.
To determine the best niche, ask yourself:
- Is the niche wide enough to produce content in the long term?
- Who are my top competitors in the niche, and how can I overcome them?
- What are the different ways of making money by writing blogs?
A great way to approach this is to shortlist two or three potential niches, then compare them based on monetization potential, competition, search demand, and your personal confidence in creating content.
Naming Your Blog: Make It Memorable
Once you’ve got your niche locked in, it’s time to name your blog — and yes, more than you know, it does matter.
Here are some real-world tips for coming up with the perfect blog name: Create a simple, memorable blog name
- Relevance or branding?: You can use a name based on your niche, go for an offbeat brand name, or even go for your own name.
- Check the availability of the domain: Opt for a .COM domain if you can — it still has the most trust.
- Avoid legal issues: Make sure the name isn’t trademarked or in use by another firm.
- Social media match: Try to get the same handle on major platforms (Instagram, YouTube, X, etc.).
Once you’ve chosen the name, the next thing to do is register your domain name and get ready to set up your blogging platform.
Step 2: Choose A Blogging Platform
When you choose a domain name before purchasing it, you need to select the blogging platform you want to publish your posts on. For this, there are many platforms available; some of them are given below:
- WordPress.com — you can use this if you need as many customization options as you wish.
- Blogger.com —This is good for those who are in the beginning of blogging.
- Medium.com — if you wish to write content in a storytelling way, you can use this platform.
- Wix.com — you can use this platform to write a blog by drag-and-drop website building methods.
It’s better to choose a platform that can be upgraded in the future when your blogging improves.
Step 3: Pick and Register a Domain Name
While choosing a domain name , you want to know that your domain name is the address of your blog; people want to remember it, so mind the below things :
- Short and easy to type
- Relevant to your niche or brand
- Memorable and unique
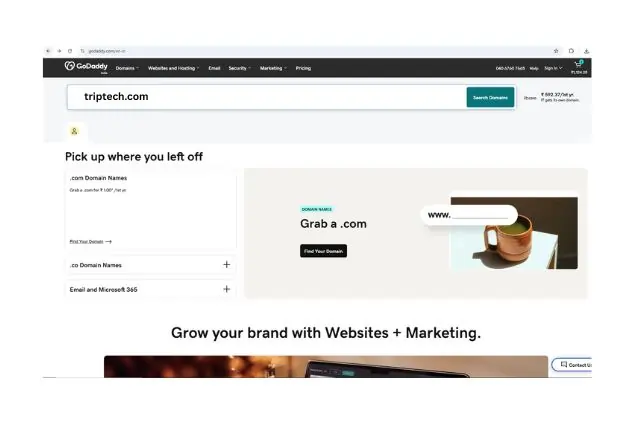
Find your blog name by brainstorming some domain names. If you filter it out, check out its availability in domain registrars like GoDaddy, Cloudflare, or Namecheap.
If you notice that your desired name is already taken, then try different or other extensions like .net, .co, .ae for UAE, or .io.
Here’s how to register a domain:
- Create an account with a domain registrar
- Search for your domain name and add it to your cart
- Enable domain privacy protection (usually free)
- Proceed to checkout and complete the payment
Once your domain is registered, you’re ready to move on to building and customizing your blog.
Step 4: Get Reliable Hosting for Your Blog
With your domain name ready, the next step is to choose a web hosting provider—this is where all your blog files, images, and content will be stored online.
Types of Hosting (Simplified):
- Shared Hosting— This hosting is perfect for beginners who do not require good tech knowledge, and it is easy to manage and simple.
- VPS Hosting— Those who need this hosting must have some technical knowledge to manage it. This hosting provides a better-performing server.
- Dedicated Hosting— This provides you complete server control. If you are a beginner, do not choose this.
Recommended: Start with a shared hosting plan, preferably one that uses cPanel for easy setup and management.
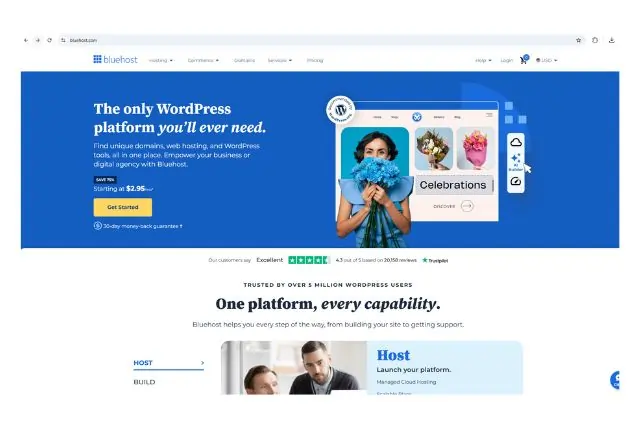
Suggested Host: Bluehost
Bluehost is a hosting provider best for beginner bloggers. It is a very affordable and reliable hosting platform. Starting at just $2.95/month, it includes
- Free .COM domain for the first year
- One-click WordPress installation
- 30 day money back guarantee
- 24/7 support and easy-to-use dashboard
If you’re looking for more advanced performance later, you can explore cloud-based hosts like Cloudways, DigitalOcean, or Vultr.
Hosting Purchase and Blog Set Up
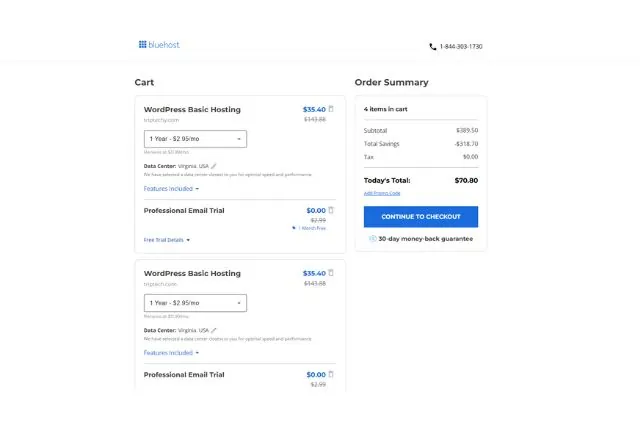
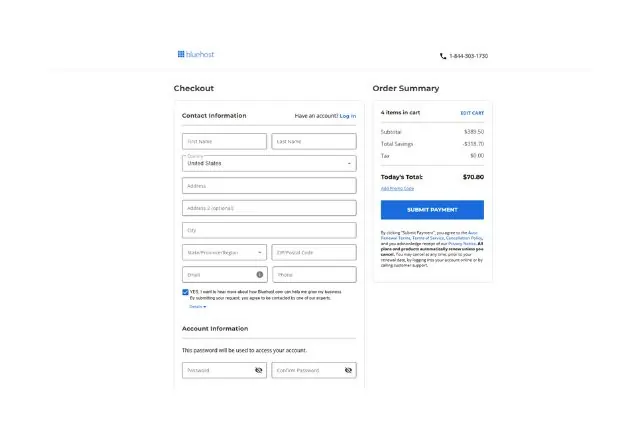
Step 1: Visit the site Bluehost.com or any other trusted host platform. Click on the Get Started button.
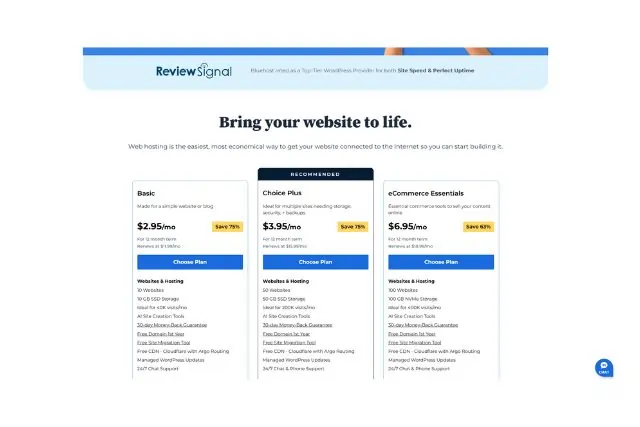
Step 2: Choose a hosting plan. If you have only one website, it’s better to choose the Basic plan. Click on the Choose Plan button.
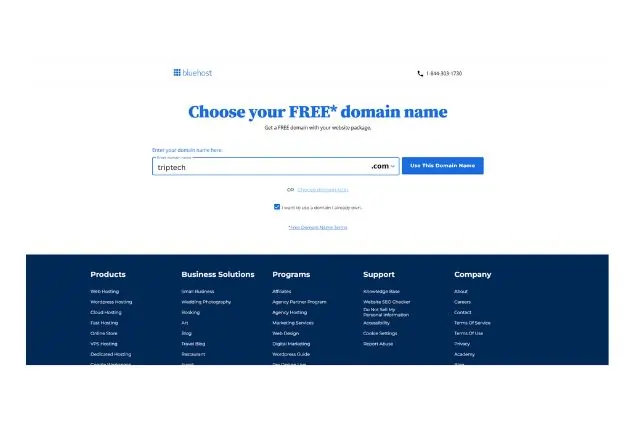
Step 3: Enter a domain name that is available (just try to register a new one or tick the ( I want to use a domain I already own ). Then click on Use This Domain Name.
Step 4: Fill out your bank account information, then check your plan again, and complete the payment process. You can uncheck extra add-ons like SiteLock, CodeGuard, etc., if not needed.
Step 5: Connect Your Domain to Hosting
Once you’ve secured both domain and hosting, it’s time to link them together:
If You Bought Both from the Same Provider:
Skip this step. Your domain is automatically connected.
If You Bought the Domain Separately:
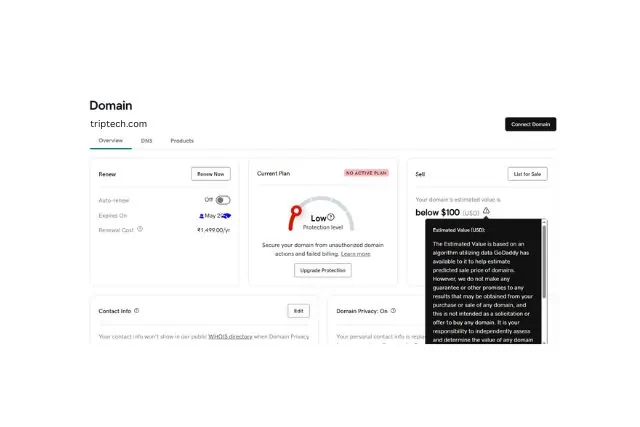
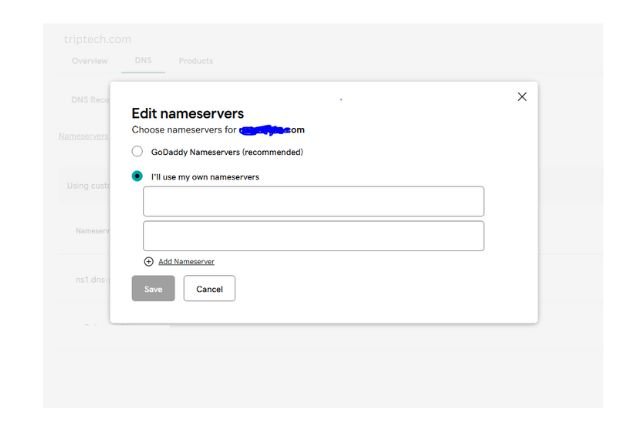
3.Click on DNS
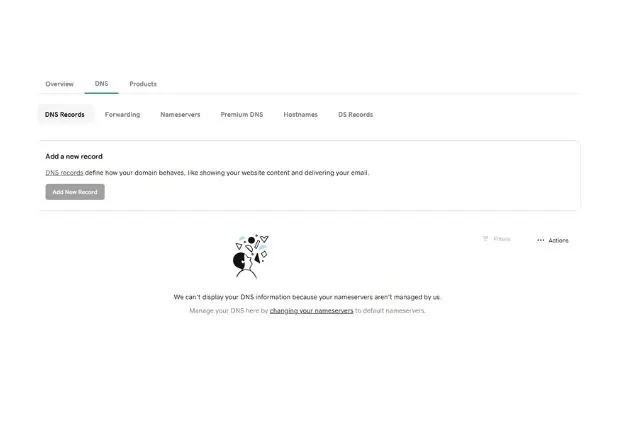
4. Click on the Nameservers, then click on Change Nameserver.
5. Replace existing nameservers with the hosting provider’s nameservers. Copy the nameserver from your hosting and paste it here. (e.g., for Bluehost), then SAVE
ns1.bluehost.com
ns2.bluehost.com
Using Cloudways or DigitalOcean?
Find the IP address of the server, and in domain DNS settings, add a new record to point the IP to your domain.
Step 6: Install and Configure WordPress
Now, your domain and hosting are ready. Install WordPress. WordPress is the best content management system (CMS ). Which is trusted by over 40% of websites online in the world. The specialty of WordPress is that it is a very powerful, customizable platform for blogging.
Installing WordPress on Bluehost
If you’re using Bluehost, installing WordPress is incredibly easy:
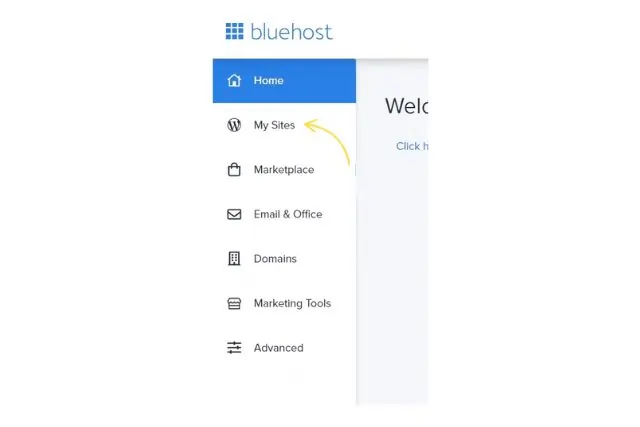
- Log in to your Bluehost dashboard.
- Go to My Sites and click Add Site.
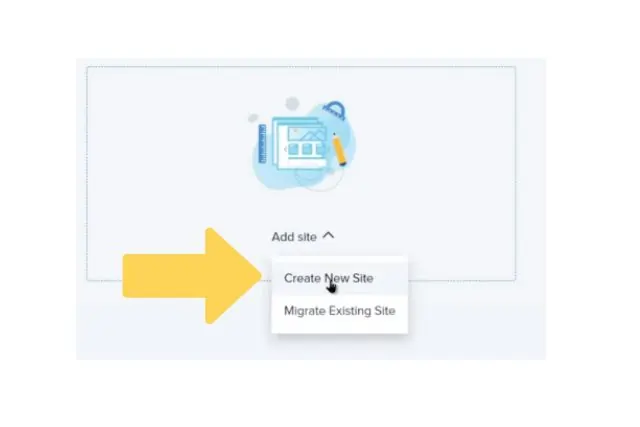
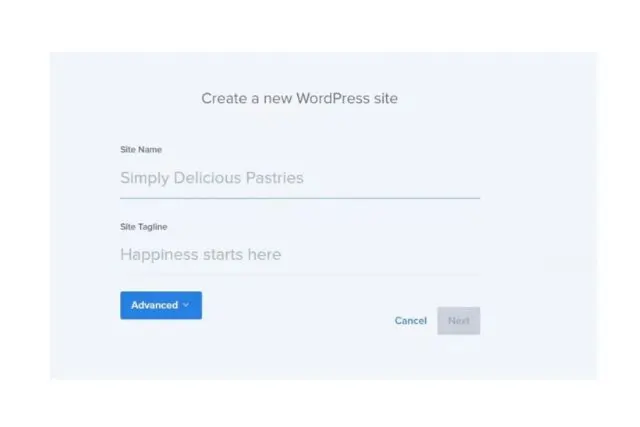
3. Create New Site—select this and enter your blog title and tagline if needed.
4. Select your domain and click Next. Bluehost will handle the installation.
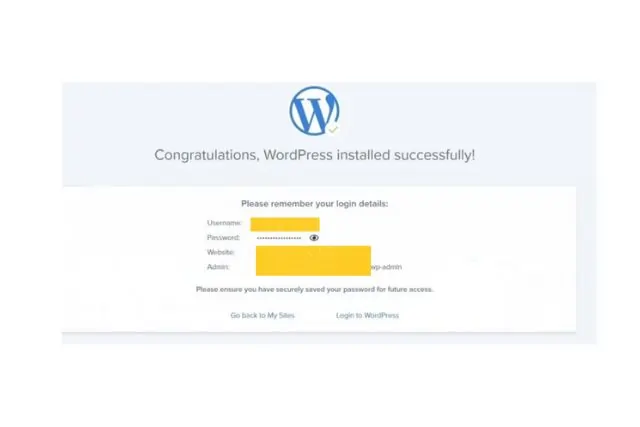
5. Once it’s done, click Login to WordPress—you’re officially in!
Step 7: Configure WordPress Settings
A fresh WordPress install comes with default settings that need a little tweaking. Here’s what to adjust:
- Permalinks Setting : In the WordPress dashboard, click Settings > click on Permalinks and select Post name. This helps for SEO-friendly URLs.
- Adjust Site Preferences: Review settings like timezone, date format, and week start day under Settings > General.

- Delete Sample Content: Remove the default post, page, and comment to start fresh.
- Remove Unused Plugins: Delete any pre-installed plugins you don’t need.
Step 8: Select a Theme and Install it
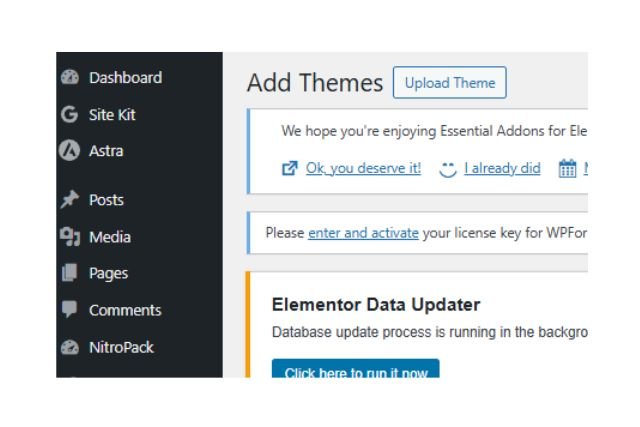
Choose a theme that you like in WordPress; the design of the blog is determined by your theme. Here you have an option to explore lots of free themes, or if you want more features in themes, you can go for premium ones.
To Install a Free Theme:
There is not much to say about installing themes in WordPress since that is a quick and easy process. It begins with accessing the WordPress dashboard. After that, you are supposed to press on Appearance and later Themes, after which you will then Add New.
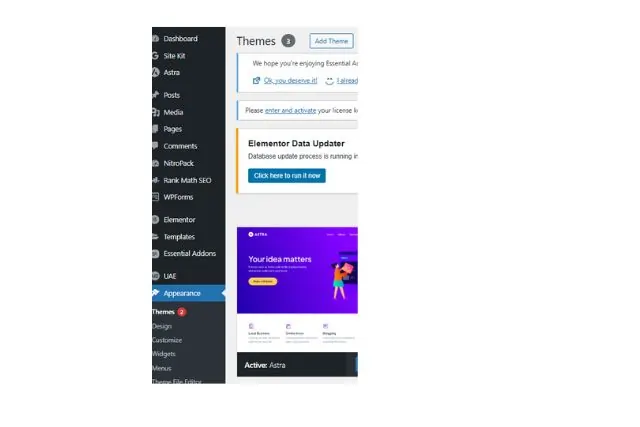
A user can explore the available themes and search for specific ones like Astra, Newspaper, etc. Once they have chosen one, they need to click “Install” followed by “Activate” to have the selected theme applied to their website.
To make changes in appearance, just go to the theme you have activated; there will be a Customize button to do the same.
For the premium theme, like if you bought one from ThemeForest, you’ll need to go with the Upload Theme option—upload the ZIP file you received from the purchase and install it manually.
Step 9: Add Essential Plugins
Plugins enhance your website’s functionality. Whether it’s SEO, forms, caching, or image optimization—there’s a plugin for almost everything.
How to Install a Plugin:
- One way is going to Plugins on the WordPress Dashboard > Add Plugin.
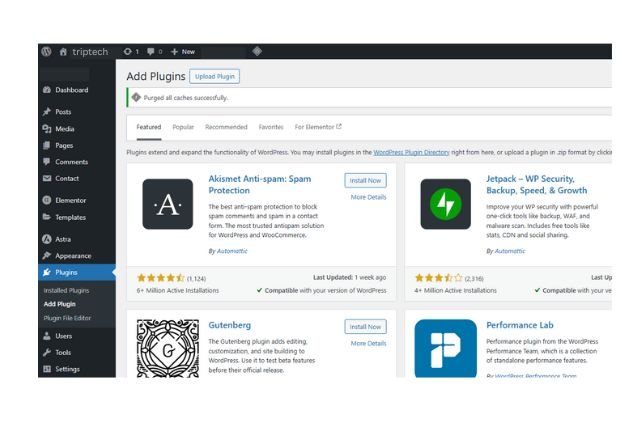
- When you already have in mind the plugin you want to install, you can use the search bar to find the plugin of your choice, and then once you locate it, click on Install and then Activate this.
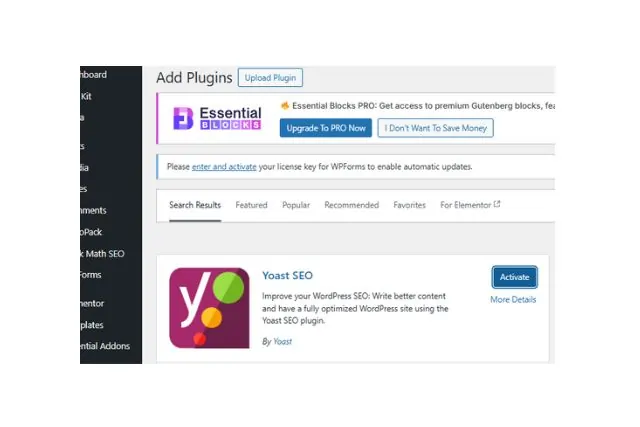
Installing must-have plugins for beginners:
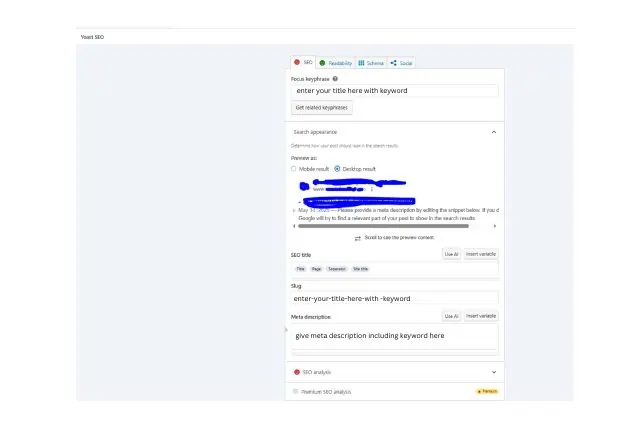
Yoast SEO This will help you optimize your blog content and rank your posts.
- Contact Form 7 allows the addition of a very simple contact form to your blog.
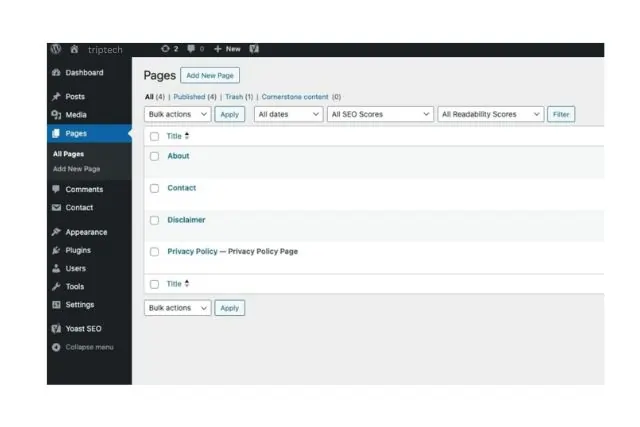
Step 10: Publish Essential Pages
Create some essential blog pages for your website before starting to write new blog posts. Which are some listed below?
- About: Introduce yourself or your blog’s purpose.
- Contact: Add a simple form using Contact Form 7.
- Privacy Policy: WordPress includes a default one—just edit and publish.
- Disclaimer (optional): Useful for affiliate sites or professional blogs.
To add pages, go to Pages > Add New, enter your content, and hit publish.
Publish Your First Blog Post
Just write a topic: a heading, subheading, bullets, or whatever, and publish your first article. That’s a huge event, and you need to plan for it.
Before you write a word, take a few minutes to do some foundational keyword research. This allows you to discover topics that people are currently looking for—hopefully with low competition and high search volume. If you’re a beginner, think up 10 topics for content that interest you, are in your niche, solve a real problem, or answer a burning question for potential audience members.
- How to post in WordPress
- Log into Your WordPress Admin Panel
- Navigate to Posts > Add New
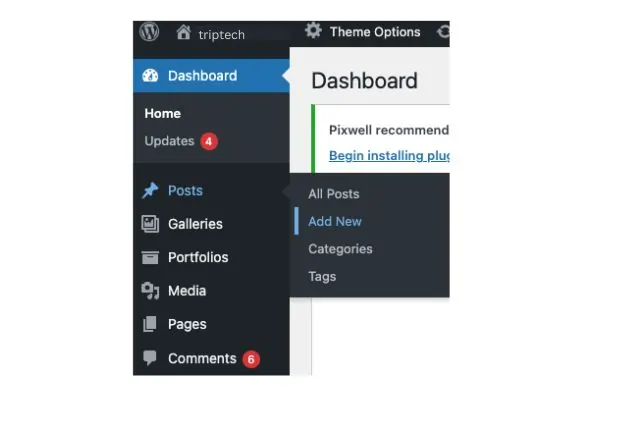
This will open Gutenberg Editor, which is a block-based content editor in WordPress.
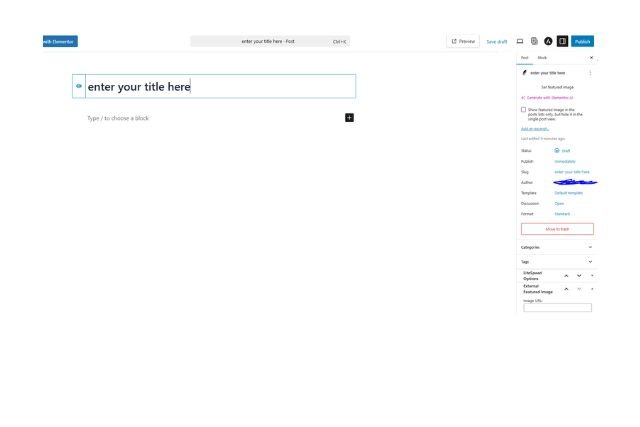
Writing Your Article
Start by entering your blog post title—this becomes your H1 heading. Click the “+” (Add Block) button to add different types of content blocks like:
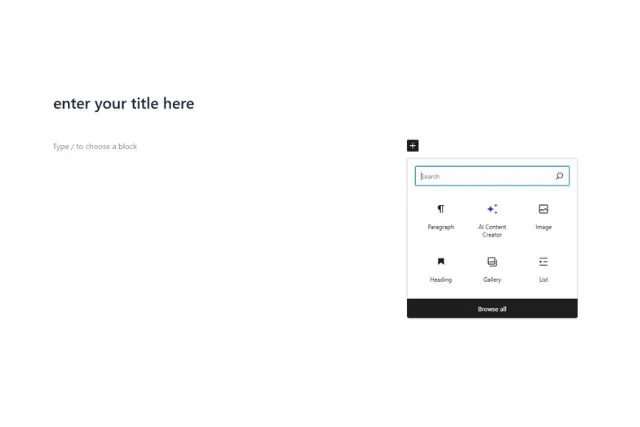
- Paragraphs
- Headings (H2, H3, etc.)
- Images
- Lists
- Buttons
- Columns
- Shortcodes
- Embeds
Once your content is written and formatted, assign relevant categories and tags, and set a featured image to visually represent your article.
For better visibility on search engines, use an SEO plugin like Yoast SEO to:
- Add a meta description
- Set a focus keyword
- Improve SEO and readability scores
Finally, hit Publish to make your first article live!
Drive Traffic to Your Blog
Creating a blog is just the beginning—attracting visitors is the real challenge. I will provide you the methods we can use to drive traffic
1. Search Engine Optimization (SEO)
Do SEO for long-term success. Focus on:
- Keyword research
- On-page optimization
- Quality content
- Backlink building
- Topical authority and EEAT (Experience, Expertise, Authoritativeness, Trustworthiness)
2. Pinterest Marketing
Pinterest is a powerful visual search engine. Design appealing pins and link them back to your blog posts. Consistency is key to building traction here.
3. Social Media Promotion
Don’t rely solely on Google. Promote your blog on platforms like
This diversifies your traffic sources and builds a community.
4. Email Marketing
Set up an email newsletter early. In your email marketing, encourage the readers to open it by giving something valuable like a checklist or guide. This allows you to build a loyal audience and share new posts, product recommendations, and exclusive offers.
5. Build Direct Traffic
Over time, work on building your brand. If your blog becomes known for providing value, people will return directly—without needing Google or social media.
Conclusion
Starting a blog is easier than ever, and with the right approach, it can become a rewarding source of income and influence.
Here’s a quick recap:
- Choose your niche and blog name
- Register a domain and get web hosting
- Install WordPress
- Pick and customize your theme
- Install essential plugins
- Tweak WordPress settings
- Publish valuable content
- Promote your blog strategically
- Use SEO and build multiple traffic channels
- Monetize and scale
Remember, growth takes time. Be consistent, stay focused, and keep learning. Have questions? Comment below and let me know; I will help you.